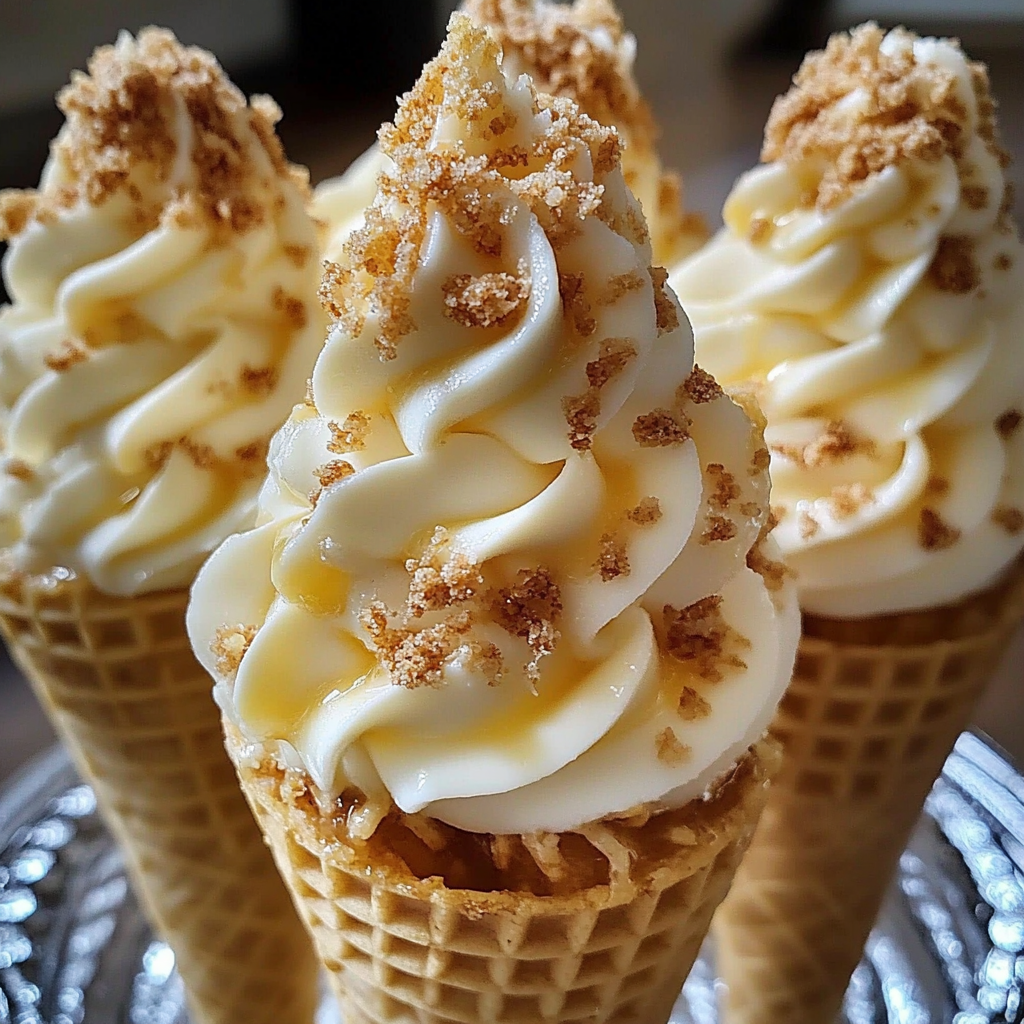
Banana Pudding Cheesecake Cones are not just desserts; they are delicious little bursts of joy that combine creamy decadence with delightful crunch. Imagine biting into a cone filled with luscious pudding and velvety cheesecake, where each spoonful dances on your taste buds like a sugar-fueled child at a birthday party.

I first discovered these heavenly cones at a summer picnic, where my friends and I were attempting to outdo each other with our dessert creations. The moment I took a bite, the world faded away, and it was just me and the sweet symphony of banana flavors. These cones are perfect for any occasion: from family gatherings to spontaneous snack attacks.
Why You'll Love This Recipe
- This irresistible dessert combines ease of preparation with an explosion of flavor
- The visual appeal of these cones makes them the star of any event
- Versatile enough to be enjoyed anytime, they will impress both kids and adults alike
- Plus, cleanup is a breeze
The look on my friend Sarah’s face when she took her first bite was priceless; she was immediately transported to dessert heaven.
Essential Ingredients
Here’s what you’ll need to make this delicious dish:
Graham Cracker Cones: The perfect crunchy vessel for your creamy filling—choose ones that are sturdy enough to hold all that goodness.
Ripe Bananas: Use perfectly ripe bananas for maximum sweetness; they should have a few brown spots for the best flavor.
Instant Vanilla Pudding Mix: A quick shortcut to achieve that creamy texture without spending hours in the kitchen.
Cream Cheese: This adds richness; make sure it’s softened at room temperature for easy blending.
Cool Whip or Whipped Cream: For lightness and fluffiness, this will elevate your pudding mixture to cloud-like heights.
Milk: Whole milk works best for creaminess; you can also use almond milk if you’re feeling adventurous.
Vanilla Extract: A splash of this will enhance the flavor profile—don’t skip it.
The full ingredients list, including measurements, is provided in the recipe card directly below.
Let’s Make it together
Prepare the Pudding Mixture: Start by whisking together instant vanilla pudding mix and milk in a bowl until smooth and thickened, which usually takes about two minutes. The aroma of vanilla will fill your kitchen.
Create the Cheesecake Filling: In another bowl, beat softened cream cheese until creamy and smooth. Gradually add in the prepared pudding mixture while mixing until fully combined—this step is crucial for achieving that delightful cheesecake texture.
Add Bananas and Cool Whip: Gently fold in sliced ripe bananas and cool whip into the creamy mixture. Be careful not to overmix; we want those banana chunks intact for extra texture.
Assemble the Cones: Take your graham cracker cones and carefully spoon the cheesecake-banana mixture into them. Fill them generously but avoid overflow—nobody wants a pudding disaster on their hands.
Chill Before Serving: Place filled cones in the refrigerator for about 30 minutes before serving. This allows all those flavors to meld beautifully together, creating an unforgettable experience when you take that first bite.
Enjoy these delightful Banana Pudding Cheesecake Cones at parties or just as a special treat after dinner. They’re guaranteed to bring smiles all around.
You Must Know
- Banana pudding cheesecake cones combine textures and flavors that make every bite a delight
- The creaminess of the cheesecake filling pairs perfectly with the crunch of the cone, creating a dessert experience you won’t forget
- Just remember, patience is key when layering for the best presentation
Perfecting the Cooking Process
Make your cheesecake filling first and let it chill while preparing the cones. This ensures perfect texture and flavor melding.

Add Your Touch
Consider adding crushed vanilla wafers or even chocolate chips to your filling for extra flavor. You can also swap bananas for strawberries.
Storing & Reheating
Store leftover cheesecake filling in an airtight container in the fridge for up to three days. Avoid freezing filled cones to maintain their crunch.
Chef's Helpful Tips
- Always use ripe bananas for maximum sweetness and flavor in your cheesecake filling
- A pinch of salt enhances the overall taste, balancing sweetness beautifully
- Don’t overfill the cones to prevent messy eating; a little goes a long way
Creating these banana pudding cheesecake cones reminds me of summer picnics with my family, where desserts were always a highlight and laughter filled the air.

FAQ
Can I use other fruits in banana pudding cheesecake cones?
Absolutely. Strawberries, peaches, or even blueberries work beautifully as substitutes.
How long can I store banana pudding cheesecake cones?
Filled cones are best enjoyed fresh, but you can store them for up to a day.
What if I don’t have ice cream cones?
You can use small cups or jars instead; just layer the filling creatively.

Banana Pudding Cheesecake Cones
- Total Time: 15 minutes
- Yield: Serves 4
Description
Indulge in the scrumptiousness of Banana Pudding Cheesecake Cones, a delightful fusion of creamy cheesecake and velvety banana pudding nestled in a crunchy graham cracker cone. Perfect for any gathering or as a sweet snack, these cones are sure to bring smiles with every bite. Easy to prepare and visually stunning, they will steal the show at your next event!
Ingredients
- 4 graham cracker cones
- 2 ripe bananas, sliced
- 1 box (3.4 oz) instant vanilla pudding mix
- 1 cup whole milk
- 8 oz cream cheese, softened
- 1 cup Cool Whip or whipped cream
- 1 tsp vanilla extract
Instructions
- In a bowl, whisk together the instant vanilla pudding mix and milk until smooth and thickened (about 2 minutes).
- In another bowl, beat the softened cream cheese until creamy. Gradually blend in the prepared pudding mixture until well combined.
- Gently fold in the sliced bananas and Cool Whip until incorporated.
- Spoon the cheesecake-banana mixture into the graham cracker cones generously without overflowing.
- Chill filled cones in the refrigerator for 30 minutes before serving to enhance flavors.
- Prep Time: 15 minutes
- Cook Time: 0 minutes
- Category: Dessert
- Method: No cooking required
- Cuisine: American
Nutrition
- Serving Size: 1 cone (90g)
- Calories: 210
- Sugar: 15g
- Sodium: 150mg
- Fat: 9g
- Saturated Fat: 5g
- Unsaturated Fat: 3g
- Trans Fat: 0g
- Carbohydrates: 31g
- Fiber: 1g
- Protein: 3g
- Cholesterol: 30mg
Keywords: For added texture, consider folding in crushed vanilla wafers or chocolate chips. You can substitute bananas with strawberries or peaches for a fruity twist. Store leftover filling in an airtight container for up to three days; avoid freezing filled cones.